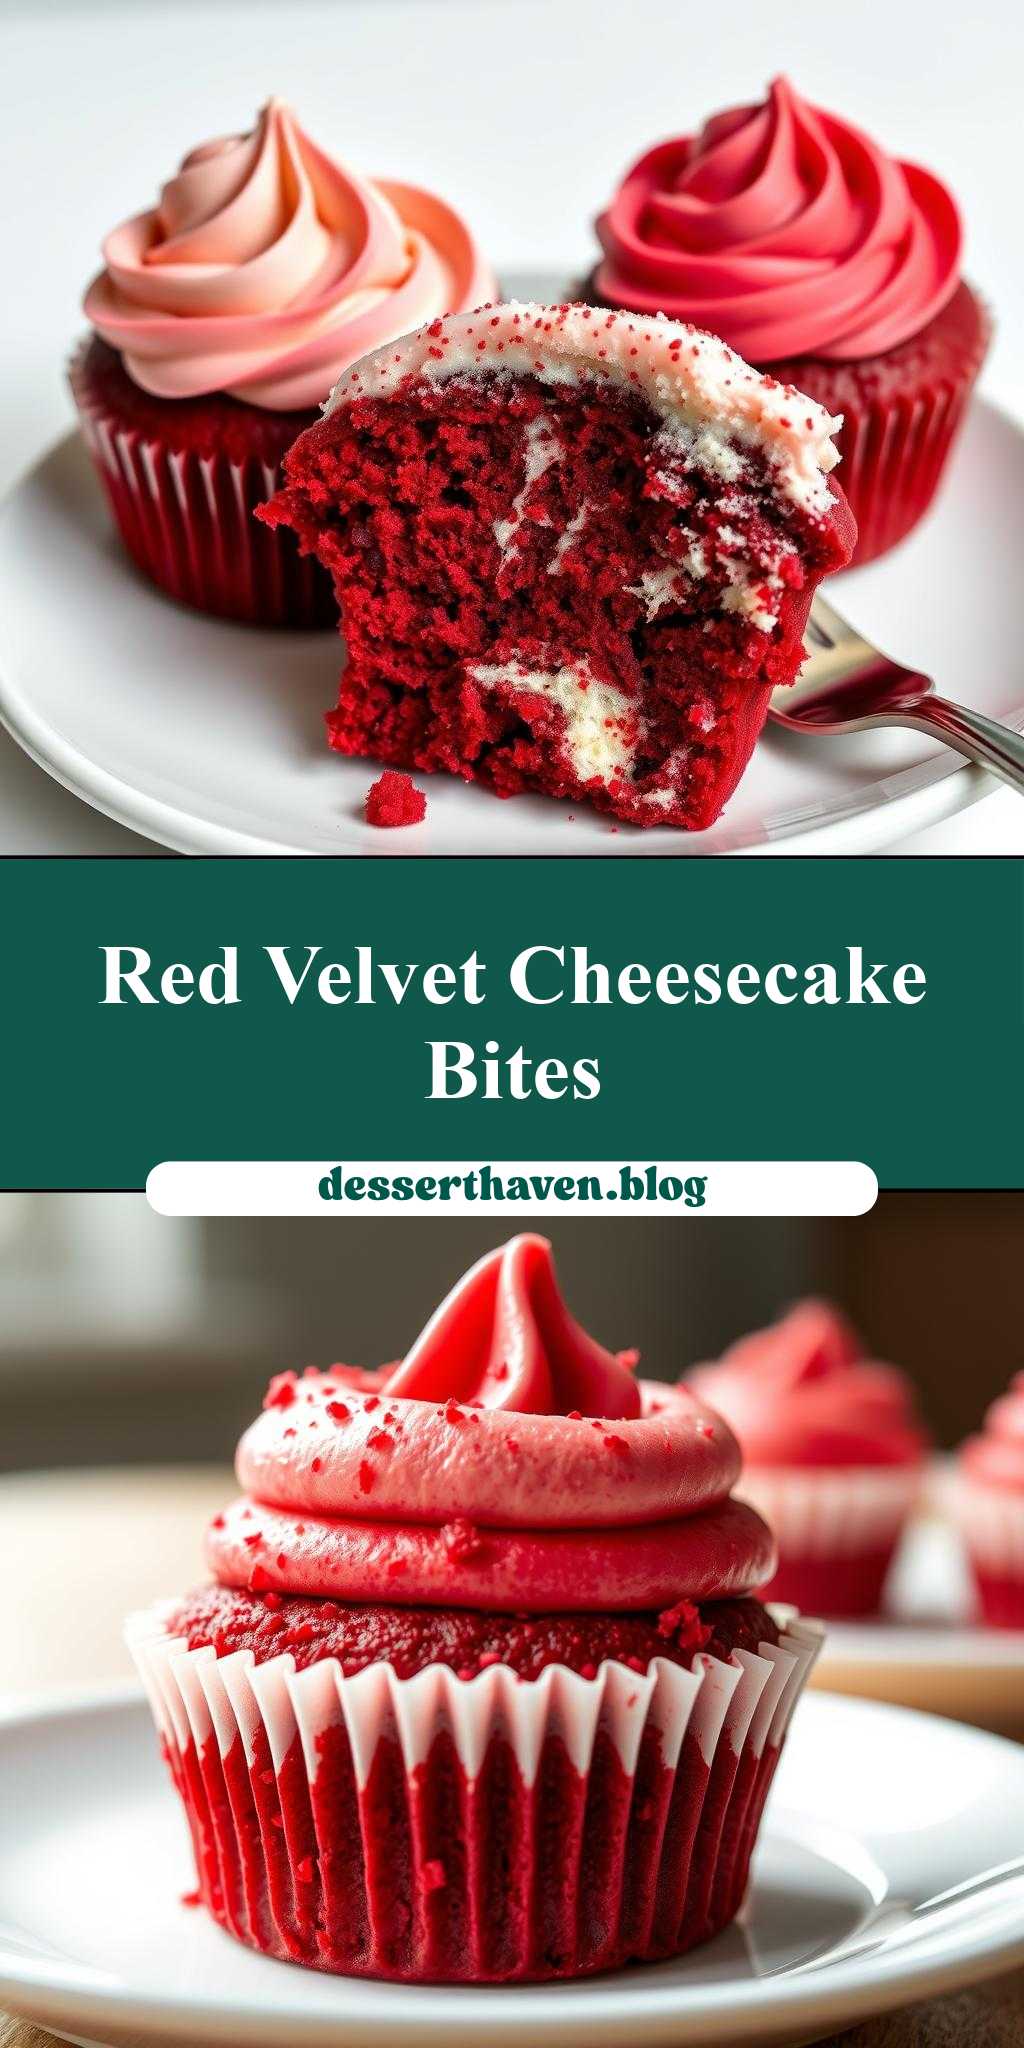
What makes red velvet cheesecake cupcakes so irresistible? Moist vanilla cake, creamy cheesecake and a hint of cocoa powder come together in these easy homemade treats, perfect for weeknight desserts. Save this idea
Red Velvet Cheesecake Cupcakes
Introduction
Indulge in the rich flavors of red velvet and the creamy delight of cheesecake, all perfectly combined in a single, adorable cupcake. These Red Velvet Cheesecake Cupcakes are not just a treat for the taste buds, but also a feast for the eyes, with their vibrant red color and velvety cheesecake topping. What makes this recipe truly special is its accessibility – using everyday ingredients and requiring minimal effort, it’s perfect for both novice bakers and seasoned pros looking to impress their friends and family with a creative dessert. The combination of the moist red velvet cake and the tangy cheesecake is a match made in heaven, offering a delightful contrast of flavors and textures in each bite.
Why This Works
- Flavor balance and ingredient accessibility: The recipe strikes a perfect balance between the deep, slightly bitter taste of cocoa and the sweetness of cheesecake, all while using ingredients that are easily found in most grocery stores.
- Ease of preparation: Despite the impressive appearance and complex flavor profile, these cupcakes are surprisingly easy to make. The steps are straightforward, and the ingredients are simple to work with.
- Impressive results with minimal effort: One of the best aspects of this recipe is how it yields professional-looking cupcakes with a fraction of the effort. Perfect for those special occasions or as a unique dessert for any gathering.
Key Ingredients
The main ingredients include all-purpose flour, granulated sugar, unsalted butter, eggs, buttermilk, cocoa powder, red food coloring, cream cheese, and vanilla extract. For practical substitutions, you can use low-fat cream cheese or substitute buttermilk with a mixture of milk and vinegar or lemon juice. The cocoa powder gives the cupcakes their distinctive red velvet flavor, while the cream cheese adds a tangy and creamy element to the cheesecake topping.
Instructions
- Step 1: Begin by preheating your oven to 350°F (175°C). Line a muffin tin with cupcake liners. In a medium bowl, whisk together flour, sugar, and cocoa powder.
- Step 2: In a large bowl, using an electric mixer, beat the butter until creamy, then add eggs one at a time, beating well after each addition. Gradually add the dry ingredients to the butter mixture, alternating with buttermilk, beginning and ending with the dry ingredients. Beat in the red food coloring.
- Step 3: Divide the batter evenly among the cupcake liners. For the cheesecake topping, beat the cream cheese until smooth, then add sugar, egg, and vanilla extract, mixing until well combined. Dollop a spoonful of the cheesecake mixture onto each cupcake.
- Step 4: Bake for about 20 minutes or until a toothpick inserted comes out clean. Allow the cupcakes to cool completely in the pan before frosting with additional cheesecake mixture if desired.
Handy Tips
- Ensure your ingredients, especially the butter and cream cheese, are at room temperature for easier mixing and a smoother batter.
- Avoid overmixing the batter to prevent dense cupcakes.
- For an intense red color, use high-quality red food coloring.
Heat Control
When baking, it’s crucial to maintain the right temperature. Preheat your oven to 350°F (175°C) and bake the cupcakes for 18-20 minutes. Check for doneness by inserting a toothpick into the center of a cupcake; it should come out clean. Overbaking can lead to dry cupcakes, so keep an eye on them after the 15-minute mark.
Crunch Factor
These cupcakes are designed to be moist and tender, with a creamy cheesecake topping. To achieve this texture, don’t overbake, and make sure to not overmix the batter. The cheesecake topping adds a smooth and creamy element, balancing out the texture perfectly.
Pro Kitchen Tricks
- Use parchment paper to line your muffin tin for easy cleanup and to prevent the cupcakes from sticking.
- Invest in a good quality electric mixer for smooth and efficient mixing of the batter and cheesecake topping.
- For an extra creamy cheesecake topping, make sure all the ingredients are at room temperature before mixing.
Storage Tips
- Store the cupcakes in an airtight container in the refrigerator for up to 5 days.
- For longer storage, consider freezing the cupcakes without the cheesecake topping, then thaw and top as needed.
- When reheating, let the cupcakes come to room temperature or gently warm them in the microwave.
Gift Packaging Ideas
These cupcakes make perfect gifts due to their visually appealing nature and delicious taste. Consider packaging them in decorative cupcake boxes or bags, tied with a ribbon and accompanied by a handwritten note. For a more rustic look, place the cupcakes in a wooden crate or a basket lined with parchment paper.
Flavor Variations
- Different spices: Add a pinch of cinnamon or nutmeg to the batter for an extra depth of flavor.
- Creative toppings: Top the cheesecake with fresh fruits, chocolate shavings, or chopped nuts for added texture and flavor.
- Ingredient swaps: Use almond flour instead of all-purpose flour for a gluten-free version, or substitute the cream cheese with mascarpone for a richer cheesecake topping.
Troubleshooting
- Texture problems: If the cupcakes turn out too dense, it might be due to overmixing. If they’re too dry, they might have been overbaked.
- Ingredient replacements: Always try to use the ingredients called for in the recipe, but if substitutions are necessary, do so with similar ingredients to maintain the flavor and texture balance.
- Over/undercooking signs: Keep an eye on the cupcakes while they’re baking. They should be firm to the touch and a toothpick inserted into the center should come out clean. If undercooked, they will be soft and possibly soggy; if overcooked, they will be dry and crumbly.
FAQs
- Can I freeze it? Yes, you can freeze the cupcakes without the cheesecake topping for up to 2 months. Thaw and top with cheesecake mixture when needed.
- Is it gluten-free? Not in its original form, but you can make it gluten-free by substituting the all-purpose flour with a gluten-free flour blend.
- Can I double the recipe? Yes, you can easily double or triple the recipe to make more cupcakes. Just ensure you have enough muffin tins and adjust the baking time slightly if necessary.
Conclusion
With these Red Velvet Cheesecake Cupcakes, you’re not just baking a dessert; you’re creating an experience. The combination of flavors and textures, along with the vibrant color, makes them a standout at any gathering. Don’t be afraid to experiment with different toppings or flavor variations to make the recipe your own. Whether you’re a seasoned baker or just starting out, this recipe is sure to impress and delight. So go ahead, get baking, and share the joy of these delicious cupcakes with your loved ones.