What makes red velvet cake so irresistible in bite-sized form? These easy homemade cake balls are made with rich cream cheese and deep red velvet cake, perfect for a quick weeknight dessert. Save this idea for your next family favorite treat.
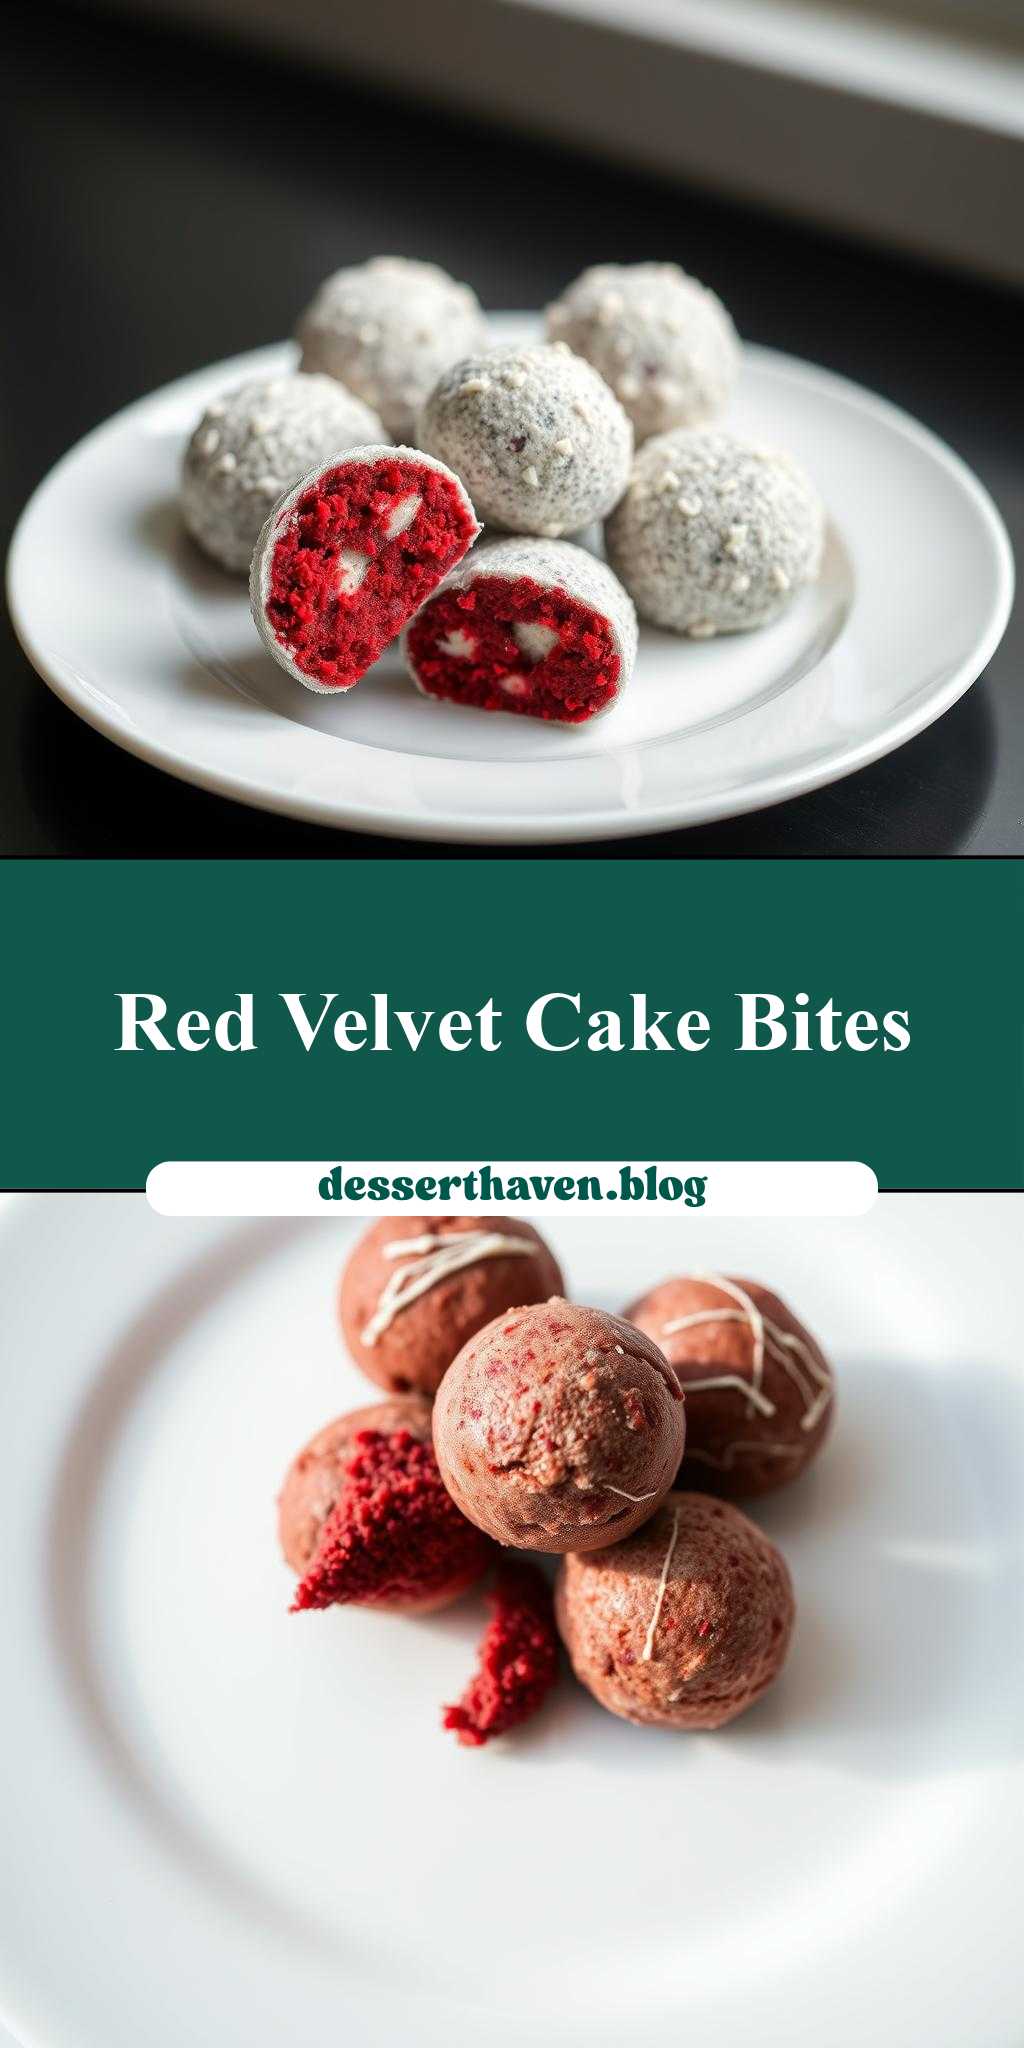
red velvet cake balls on a white plate
Introduction
Imagine the delight of biting into a tender, moist cake ball, coated in a rich, velvety chocolate, and experiencing the explosion of flavors that red velvet cake is known for. This recipe for red velvet cake balls on a white plate is not just about creating a stunning dessert; it’s about crafting an experience that combines ease, flavor, and creativity, all using everyday ingredients that you might already have in your pantry. Whether you’re a seasoned baker or a beginner in the kitchen, this recipe is designed to guide you through the process with clarity and simplicity, ensuring that your red velvet cake balls turn out perfectly every time.
Why This Works
- Flavor balance and ingredient accessibility: The combination of red velvet cake mix, cream cheese frosting, and melted chocolate creates a balanced flavor profile that is both familiar and decadent. The use of accessible ingredients means you can make this dessert without having to hunt down specialty items.
- Ease of preparation: Despite the impressive presentation, these cake balls are surprisingly easy to prepare. The process involves mixing, shaping, and dipping—steps that are straightforward and require minimal technical skill.
- Impressive results with minimal effort: The end result is a dessert that looks like it was purchased from a bakery, with its uniform cake balls and smooth chocolate coating. This makes it perfect for special occasions or as a gift, without requiring hours of labor-intensive preparation.
Key Ingredients
The main ingredients for this recipe include a red velvet cake mix, cream cheese frosting, melted white chocolate or candy melts for coating, and optional decorations such as sprinkles or chopped nuts. For those looking for substitutions, you can make your own red velvet cake from scratch using flour, sugar, cocoa powder, and food coloring, and similarly, you can prepare your own cream cheese frosting with cream cheese, butter, and powdered sugar. Practical substitutions can also be made for the chocolate coating, such as using dark or milk chocolate for a different flavor profile.
Instructions
- Step 1: Begin by preparing your workspace. This includes laying out parchment paper or a silicone mat for the cake balls to dry on, and having all your ingredients ready. Bake the red velvet cake according to the package instructions, and let it cool completely.
- Step 2: Crumb the cooled cake into a large mixing bowl. Add a sufficient amount of cream cheese frosting to the cake crumbs and mix until the cake is well coated and can be formed into balls. The mixture should be moist but not too wet to handle.
- Step 3: Shape the cake mixture into balls, approximately 1 inch in diameter. Place the balls onto the prepared parchment paper or silicone mat. Chill the cake balls in the refrigerator for about 30 minutes to firm up.
- Step 4: Melt the white chocolate or candy melts in a double boiler or in the microwave in 30-second increments, stirring between each interval until smooth. Dip the end of a fork or dipping tool into the melted chocolate and then into the cake ball, coating it completely. Tap off any excess chocolate by gently tapping the fork or dipping tool against the side of the bowl. Place the coated cake ball back onto the parchment paper. If desired, add sprinkles or chopped nuts immediately after coating, before the chocolate hardens.
Handy Tips
- Ensure the cake is completely cooled before mixing with the frosting to avoid a too-wet mixture.
- Don’t overmix the cake and frosting, as this can lead to dense cake balls.
- Experiment with different types of chocolate for the coating to change up the flavor.
- For an extra crunchy exterior, you can chill the cake balls after coating and then dip them in melted chocolate a second time.
Heat Control
When melting the chocolate, it’s crucial to control the heat to avoid burning the chocolate. If using a microwave, check and stir the chocolate every 30 seconds to prevent overheating. If using a double boiler, ensure the water does not boil, as the steam can cause the chocolate to seize up.
Crunch Factor
The crunch factor in these cake balls comes from the outer layer of chocolate. To achieve a nice crunch, make sure the chocolate is not too hot when coating the cake balls, as this can cause the chocolate to pool at the bottom. Also, chilling the coated cake balls in the refrigerator for a few minutes before serving will help the chocolate set and provide a satisfying crunch when bitten into.
Pro Kitchen Tricks
- To make the cake balls more uniform, use a small cookie scoop to portion out the mixture before shaping into balls.
- For a glossy finish on the chocolate, add a small amount of shortening like Crisco to the melted chocolate before coating the cake balls.
- Use high-quality chocolate for the best flavor and texture.
Storage Tips
- Store the cake balls in an airtight container in the refrigerator for up to 5 days.
- For longer storage, these cake balls can be frozen for up to 2 months. Simply place them in a single layer in a freezer-safe bag or container and thaw at room temperature when ready to serve.
- When storing, keep the cake balls away from strong-smelling foods, as they can absorb odors easily.
Gift Packaging Ideas
These red velvet cake balls make a wonderful gift, especially when presented nicely. Consider placing them in decorative jars or boxes, separated by layers of parchment paper to prevent sticking. You can also wrap each cake ball individually in cellophane bags and tie with a ribbon for a more personalized touch. Adding a gift tag or a handwritten note can make the gift even more special.
Flavor Variations
- Different spices: Add a pinch of cinnamon or nutmeg to the cake mixture for a unique twist.
- Creative toppings: Use different types of sprinkles, chopped nuts, or even shredded coconut to change up the look and flavor of the cake balls.
- Ingredient swaps: Substitute the cream cheese frosting with a buttercream or whipped cream cheese for a lighter flavor.
Troubleshooting
- Texture problems: If the cake balls are too sticky, you may need to add a bit more cake crumbs. If they’re too dry, add a bit more frosting.
- Ingredient replacements: If you don’t have red velvet cake mix, you can make your own cake from scratch or use a different flavor mix as a substitute.
- Over/undercooking signs: Ensure the cake is fully baked and a toothpick inserted comes out clean. Underbaked cake can lead to cake balls that fall apart.
FAQs
- Can I freeze it? Yes, these cake balls can be frozen for up to 2 months. Simply thaw at room temperature when ready to serve.
- Is it gluten-free? This depends on the cake mix used. If you use a gluten-free cake mix, the cake balls will be gluten-free.
- Can I double the recipe? Yes, you can easily double or triple this recipe to make more cake balls. Just ensure you have enough frosting and chocolate to coat all the cake balls.
Conclusion
Making red velvet cake balls on a white plate is a fun and rewarding project that combines the joy of baking with the creativity of decorating. With these simple steps and handy tips, you’ll be well on your way to creating a dessert that’s not only delicious but also visually stunning. Don’t be afraid to experiment with different flavors and decorations to make this recipe your own, and enjoy the process of sharing your creations with friends and family. Happy baking!