What happens when you combine the richness of Nutella with the crunch of Oreos in a creamy cheesecake? This homemade dessert is an easy showstopper, perfect for weeknight treats, thanks to its quick prep time and simple ingredients like melted chocolate. Save this idea for your next family favorite dessert night.
Oreo & Nutella Cheesecake
Introduction
This Oreo & Nutella Cheesecake is a masterclass in combining everyday ingredients to create something truly extraordinary. By merging the crunch of Oreos, the richness of Nutella, and the creaminess of cheesecake, we’ve crafted a dessert that’s as easy to make as it is impressive to serve. Whether you’re a seasoned baker or a culinary newbie, this recipe is perfect for anyone looking to elevate their dessert game without breaking a sweat. With its accessible ingredients and straightforward preparation, it’s the ideal treat for family gatherings, potlucks, or simply satisfying your sweet tooth.
Why This Works
- Flavor balance and ingredient accessibility: The combination of Nutella and Oreos provides a deep, chocolate-hazelnut flavor profile that’s balanced by the cream cheese, ensuring that the cheesecake isn’t too sweet or overpowering. Plus, all the ingredients are easily found in most supermarkets.
- Ease of preparation: Unlike traditional cheesecakes that require extensive baking and cooling times, this recipe simplifies the process with a no-bake approach, making it perfect for hot summer days or when you’re short on time.
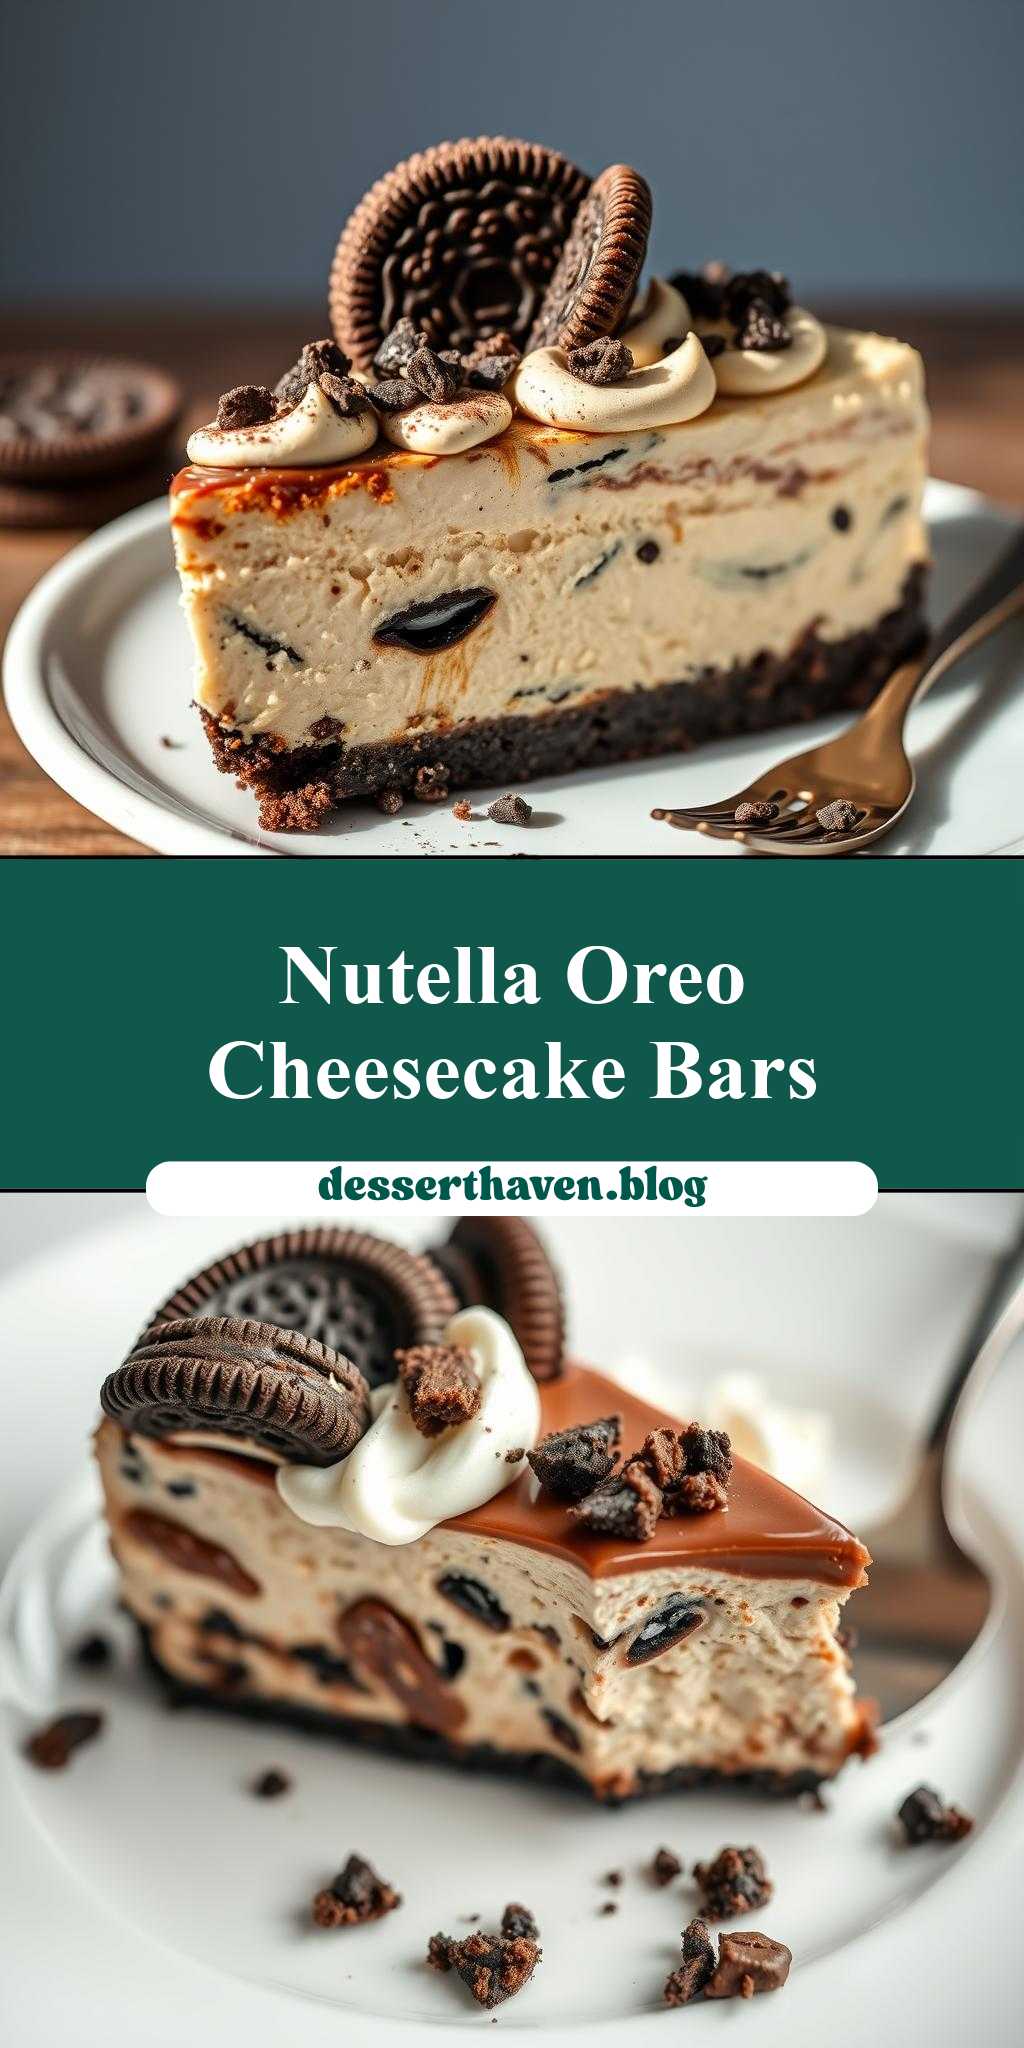
- Impressive results with minimal effort: Despite its simplicity, the Oreo & Nutella Cheesecake presents beautifully, with its layered effect and decorative topping options (like additional Oreos, Nutella drizzle, or whipped cream) making it a showstopper at any dessert table.
Key Ingredients
The main ingredients for this cheesecake include a package of Oreos for the crust, Nutella for the chocolate-hazelnut flavor, cream cheese and sour cream for the cheesecake body, granulated sugar to balance the flavors, large eggs to bind the mixture, and vanilla extract for added depth. For practical substitutions, you could use other chocolate sandwich cookies for the crust or another chocolate-hazelnut spread in place of Nutella, though the flavor profile might vary slightly.
Instructions
- Step 1: Begin by preparing your crust. Crush the Oreos in a food processor until they’re finely ground, then mix in a bit of melted butter to bind the crumbs together. Press this mixture into the bottom of a springform pan and refrigerate to set.
- Step 2: In a large mixing bowl, beat the cream cheese until it’s smooth, then gradually add the granulated sugar, beating until well combined. Next, add the sour cream, eggs (one at a time), and vanilla extract, mixing until each ingredient is fully incorporated before adding the next.
- Step 3: Melt the Nutella in a microwave-safe bowl in 30-second increments, stirring between each heating until smooth. Allow it to cool slightly, then fold it into the cheesecake mixture until well combined. Pour this mixture over the prepared Oreo crust and smooth the top.
- Step 4: Refrigerate the cheesecake for at least 4 hours or overnight to set. Before serving, you can decorate the top with additional Oreos, a drizzle of Nutella, or a dollop of whipped cream for an extra-special touch.
Handy Tips
- To ensure your cheesecake sets properly, avoid overmixing the batter, as this can introduce too much air and cause it to crack. Also, make sure to use room temperature ingredients for a smoother mixing process.
Heat Control
Since this is a no-bake cheesecake, heat control isn’t a primary concern. However, when melting the Nutella, be careful not to overheat it, as this can cause it to seize up or become too thick to fold into the cheesecake mixture smoothly. Heating it in short increments and stirring well between each heating helps maintain its smooth, velvety texture.
Crunch Factor
The crunch in this dessert comes from the Oreo crust, providing a delightful textural contrast to the smooth cheesecake. To maintain this crunch, it’s essential to not overprocess the Oreos when making the crust, as this can make them too fine and dense. Also, chilling the crust before filling helps it hold its shape and texture better.
Pro Kitchen Tricks
- For a cleaner release from the springform pan, run a knife around the edges of the cheesecake before unlatching the pan sides. This ensures the cheesecake comes out intact and avoids any cracking.
- Consider using a water bath if you decide to bake the cheesecake for a more traditional texture. This helps prevent cracking and ensures even cooking.
Storage Tips
- This cheesecake can be stored in the refrigerator for up to 5 days. It’s best to keep it in an airtight container to maintain freshness and prevent absorption of other refrigerator odors.
- For longer storage, the cheesecake can be frozen. Wrap it tightly in plastic wrap or aluminum foil and place it in a freezer-safe bag. Frozen, it will keep for up to 2 months. Thaw frozen cheesecake in the refrigerator overnight before serving.
Gift Packaging Ideas
This cheesecake makes a wonderful gift, especially for birthdays or holidays. Consider packaging it in a decorative tin or on a nice serving plate, covered with plastic wrap or aluminum foil. You could also add a personal touch with a handwritten note or a small bouquet of flowers. For a more rustic look, wrap the cheesecake in parchment paper and tie with a ribbon.
Flavor Variations
- Different spices: Adding a pinch of salt or a teaspoon of espresso powder can enhance the chocolate flavor and depth of the cheesecake.
- Creative toppings: In addition to Nutella and Oreos, consider topping your cheesecake with fresh fruits, caramel sauce, or even a sprinkle of sea salt for varied flavor and texture combinations.
- Ingredient swaps: While Nutella gives this cheesecake its distinctive flavor, you could experiment with other chocolate spreads or even peanut butter for a different twist.
Troubleshooting
- Texture problems: If your cheesecake doesn’t set properly, it might be due to overmixing the batter or not chilling it long enough. Ensure all ingredients are at room temperature and mix gently but thoroughly.
- Ingredient replacements: If you’re looking to replace any ingredients due to dietary restrictions or preferences, consider using vegan cream cheese or gluten-free Oreos. However, note that substitutions can affect the final texture and flavor.
- Over/undercooking signs: Since this is a no-bake recipe, the primary concern is ensuring the cheesecake chills long enough to set. If it’s too soft, it may not have chilled sufficiently. If it’s too hard, it might have been overchilled or the ingredients weren’t at room temperature during mixing.
FAQs
- Can I freeze it? Yes, the cheesecake can be frozen for up to 2 months. Wrap it tightly and thaw in the refrigerator overnight when you’re ready to serve.
- Is it gluten-free? The traditional recipe includes Oreos, which contain gluten. However, you can make a gluten-free version by substituting the Oreos with gluten-free alternatives.
- Can I double the recipe? Yes, you can double the recipe, but be sure to adjust the chilling time accordingly. A larger cheesecake may require more time to set properly.
Conclusion
With its effortless preparation, stunning presentation, and decadent flavor, the Oreo & Nutella Cheesecake is sure to become a favorite among both novice bakers and seasoned dessert enthusiasts. Feel free to experiment with the recipe, trying out different flavor combinations and toppings to make it your own. Whether you’re celebrating a special occasion or just satisfying your cravings, this cheesecake is the perfect indulgence. So go ahead, get creative, and enjoy the delightful fusion of Oreos and Nutella in this sublime cheesecake.