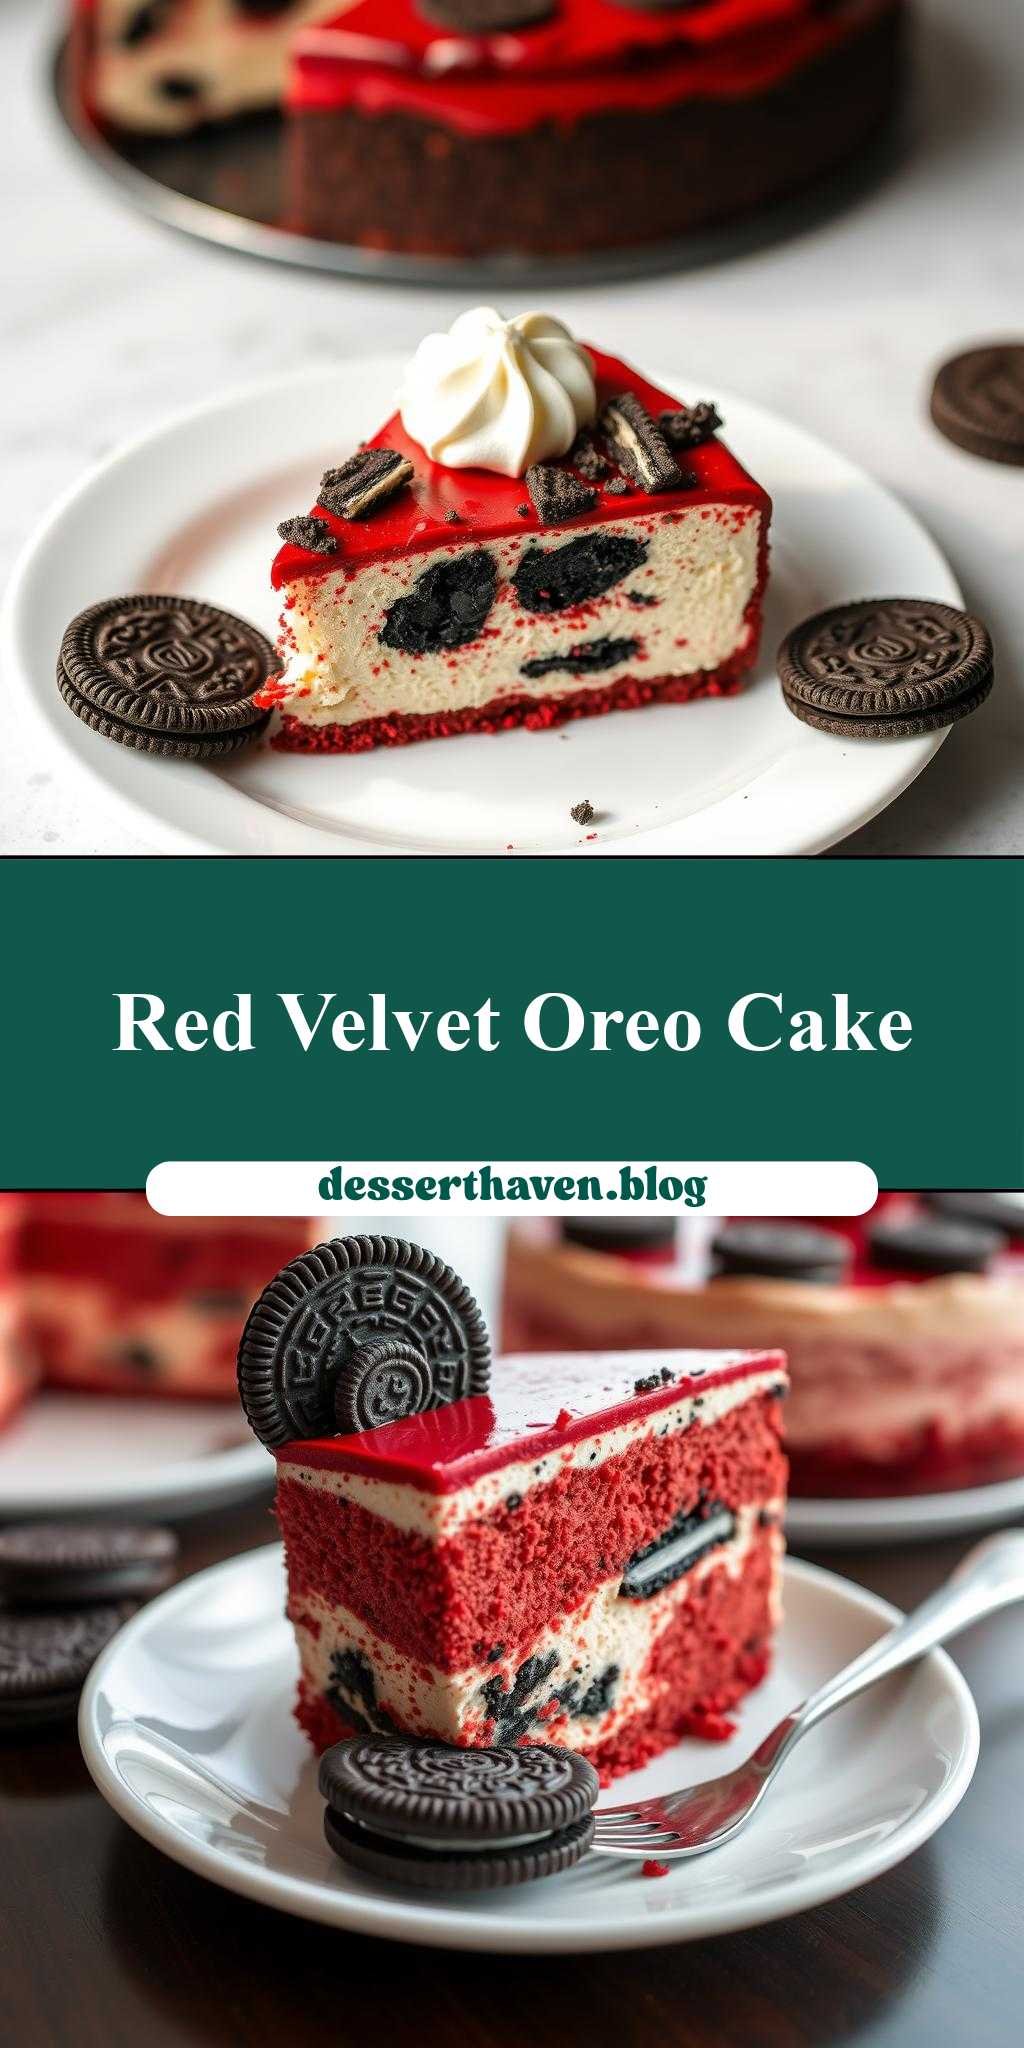
What makes a dessert truly unforgettable? For me, it’s the combination of moist red velvet cake, creamy cheesecake, and crunchy Oreo cookies in one show-stopping homemade treat. This easy recipe is a family favorite that’s perfect for weeknight dessert. Save this idea
red velvet cheesecake cake with oreo cookies
Introduction
Imagine a dessert that combines the richness of cheesecake, the moistness of red velvet cake, and the crunch of Oreo cookies. This red velvet cheesecake cake with Oreo cookies is not only a showstopper due to its vibrant color and layered structure, but it’s also surprisingly easy to make, using ingredients you might already have in your pantry. The best part? It’s incredibly versatile, allowing you to get creative with each component, from the cake’s deep red hue to the cheesecake’s creamy texture and the cookies’ crunchy contrast. Whether you’re a seasoned baker or just starting out, this recipe is sure to impress your family and friends with its unique blend of flavors and textures.
Why This Works
- Flavor balance and ingredient accessibility: The combination of red velvet cake, cheesecake, and Oreo cookies provides a perfect balance of flavors and textures that everyone will love. Moreover, the ingredients are easily accessible in most supermarkets, making it convenient to prepare.
- Ease of preparation: Despite its impressive appearance, this dessert is surprisingly easy to prepare. The cake and cheesecake components can be made ahead of time, and assembling the final product is straightforward.
- Impressive results with minimal effort: The layering of the red velvet cake, cheesecake, and Oreo cookies creates a visually stunning dessert that looks like it came from a professional bakery, all with relatively minimal effort.
Key Ingredients
The main ingredients for this recipe include all-purpose flour, granulated sugar, unsalted butter, eggs, buttermilk, food coloring, cream cheese, sour cream, vanilla extract, and Oreo cookies. For the red velvet cake, buttermilk and food coloring are crucial for achieving the right flavor and color. The cheesecake component relies on cream cheese and sour cream for its creamy texture. Oreo cookies add a delightful crunch and flavor contrast. Practical substitutions can be made, such as using milk with vinegar as a buttermilk substitute or opting for different types of cookies for the crunch factor.
Instructions
- Step 1: Begin by preheating your oven to 350°F (180°C). Prepare your cake pans and cheesecake pan by greasing them and lining the bottoms with parchment paper. Next, chop your Oreo cookies; you’ll need them crushed for the cheesecake layer and possibly some for garnish.
- Step 2: Mix the dry ingredients for the cake in one bowl and the wet ingredients in another. Combine them, adding buttermilk and food coloring to achieve the signature red velvet color. Pour the batter into the prepared pans and bake until a toothpick inserted comes out clean. Allow the cakes to cool completely.
- Step 3: Prepare the cheesecake layer by mixing cream cheese, sour cream, eggs, and vanilla extract. Fold in crushed Oreo cookies for added flavor and texture. Pour this mixture into the cheesecake pan and bake until the edges are set and the center is slightly jiggly. Let it cool completely as well.
- Step 4: Assemble the cake by placing one layer of red velvet cake on a serving plate, topping it with the cheesecake layer, and then adding another layer of cake. You can frost the outside with cream cheese frosting and decorate with additional Oreo cookies or crushed Oreos for a beautiful finish.
Handy Tips
- Ensure your ingredients, especially the butter and eggs, are at room temperature for better mixing and a lighter texture in both the cake and cheesecake.
- Don’t overmix the batter or the cheesecake mixture, as this can lead to a dense cake or a cracked cheesecake.
- For a more intense red color, use a high-quality food coloring. For the cheesecake, baking it in a water bath can help prevent cracking.
Heat Control
Controlling the heat is crucial, especially when baking the cheesecake. The ideal temperature is 350°F (180°C), and the baking time will depend on the size of your cheesecake. Look for the edges to be set and the center to be slightly jiggly. For the cake, ensure it’s baked through by checking with a toothpick. If you’re using a water bath for the cheesecake, make sure the water doesn’t boil, as this can cause the cheesecake to cook too quickly or unevenly.
Crunch Factor
The crunch factor in this dessert comes from the Oreo cookies and can be adjusted based on personal preference. You can use more or fewer cookies in the cheesecake layer and also decorate the outside of the cake with crushed or whole Oreos. For an extra crunchy texture, you could also consider adding chopped nuts or cookie crumbs to the cheesecake mixture or the cake batter.
Pro Kitchen Tricks
- Use a turntable to display your cake, making it easier to decorate and show off your masterpiece.
- For a smooth cheesecake, ensure it cools slowly and evenly. Avoid sudden temperature changes, which can cause cracking.
- When assembling the cake, use a small amount of frosting or ganache to “glue” the layers together, ensuring they don’t shift or topple over.
Storage Tips
- Store your cake in the refrigerator to keep it fresh. It can be kept for up to 5 days.
- Freezing is also an option; wrap the cake tightly in plastic wrap or aluminum foil and place it in a freezer-safe bag. Frozen cake can be stored for up to 2 months.
- When reheating, let the cake come to room temperature or warm it gently in the microwave or oven. Be cautious not to overheat, as this can cause the cheesecake to melt or the cake to dry out.
Gift Packaging Ideas
This cake makes a wonderful gift, especially for birthdays or special occasions. Consider packaging it in a decorative cake box or wrapping it in cellophane and tying it with a ribbon. For a more rustic look, you could place slices in mason jars and tie the lids with twine or ribbon. Adding a personal touch, like a handwritten note or a small bouquet of flowers, can make the gift even more special.
Flavor Variations
- Different spices: Try adding a pinch of cinnamon or nutmeg to the cake batter for a unique twist.
- Creative toppings: Instead of Oreo cookies, use different types of cookies, nuts, or even candy pieces to create a varied texture and flavor profile.
- Ingredient swaps: For a gluten-free version, substitute the all-purpose flour with a gluten-free flour blend. You can also experiment with different types of milk or flavor extracts in the cheesecake and cake recipes.
Troubleshooting
- Texture problems: If your cake turns out too dense, it might be due to overmixing. If the cheesecake is too soft, it might not have baked long enough.
- Ingredient replacements: Always try to use the ingredients called for in the recipe, but if you must substitute, do so with similar ingredients. For example, you can use milk with vinegar or lemon juice as a buttermilk substitute.
- Over/undercooking signs: Keep an eye on your cake and cheesecake while they’re baking. A toothpick inserted into the cake should come out clean, and the cheesecake should be slightly jiggly in the center.
FAQs
- Can I freeze it? Yes, you can freeze the cake for up to 2 months. Wrap it tightly and place it in a freezer-safe bag.
- Is it gluten-free? Not in its original form, but you can make it gluten-free by substituting the flour with a gluten-free flour blend.
- Can I double the recipe? Yes, you can double the recipe, but be sure to adjust the baking time accordingly. Keep an eye on the cake and cheesecake to ensure they don’t overcook.
Conclusion
Making a red velvet cheesecake cake with Oreo cookies is a fun and rewarding baking project that’s perfect for special occasions or just a sweet treat any time of the year. With its layers of moist red velvet cake, creamy cheesecake, and crunchy Oreo cookies, this dessert is sure to impress. Don’t be afraid to experiment with different flavors and decorations to make it your own. Whether you’re a beginner baker or a seasoned pro, this recipe is a great way to challenge yourself and enjoy the process of creating something truly special. So go ahead, get baking, and share your masterpiece with friends and family!