What makes a dessert truly unforgettable? This stunning red velvet cheesecake cake combines the richness of homemade cheesecake with the simplicity of a quick and easy layer cake, featuring a decadent white frosting and crunchy Oreo cookies on top. Save this idea for your next special occasion dessert.
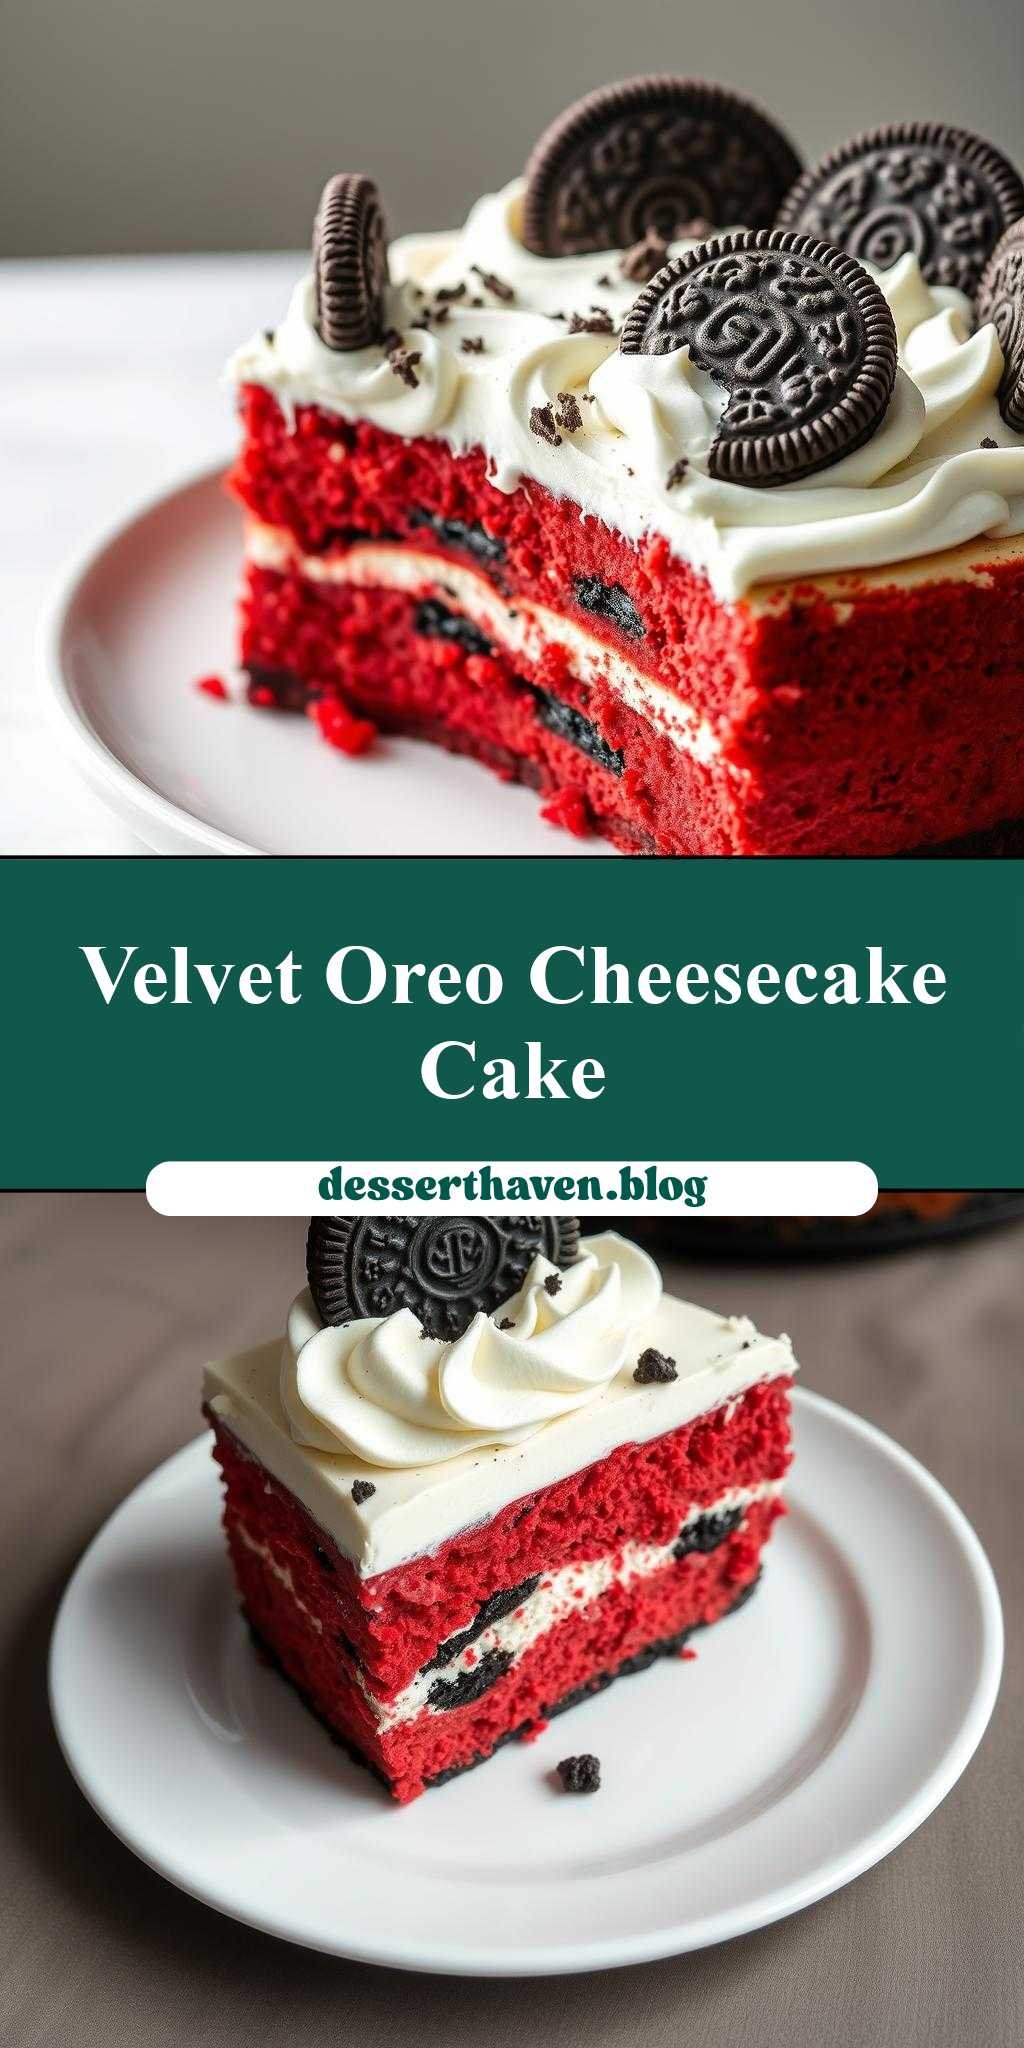
red velvet oreo cheesecake cake with oreo cookies on top and white frosting
Introduction
The combination of red velvet cake, cheesecake, and Oreo cookies is a match made in heaven, offering a rich, velvety texture, a burst of chocolate flavor, and the crunch of cookies. This recipe for a red velvet Oreo cheesecake cake with Oreo cookies on top and white frosting is not only a showstopper but also surprisingly easy to make. By using everyday ingredients and simple techniques, you can create a dessert that’s perfect for special occasions or just a sweet treat any day of the week. The best part? It’s incredibly versatile, allowing you to get creative with the ingredients and presentation to make it truly your own.
Why This Works
- Flavor balance and ingredient accessibility: The combination of red velvet cake, cheesecake, and Oreo cookies provides a delightful balance of flavors and textures, all made with easily accessible ingredients.
- Ease of preparation: Despite its impressive appearance, this dessert is relatively simple to prepare, requiring basic baking and mixing skills.
- Impressive results with minimal effort: The layering of the red velvet cake, cheesecake, and the topping of Oreo cookies and white frosting creates a visually stunning dessert that’s sure to impress, without requiring excessive time or effort.
Key Ingredients
To make this red velvet Oreo cheesecake cake, you’ll need several key ingredients. For the cake, you’ll need flour, sugar, cocoa powder, buttermilk, eggs, and food coloring to give it that signature red velvet color. For the cheesecake layer, cream cheese, eggs, vanilla extract, and sour cream are essential. Oreo cookies are used both in the cheesecake batter for added flavor and on top of the cake for decoration. Finally, a simple white frosting made from butter, cream cheese, and powdered sugar tops it all off. Practical substitutions can be made for ingredients like buttermilk (using milk with vinegar or lemon juice) and sour cream (using yogurt), making this recipe accessible to those with dietary restrictions or preferences.
Instructions
- Step 1: Begin by preheating your oven and preparing your pans. You’ll need to chop your Oreo cookies for both the cheesecake layer and the topping, and measure out all your ingredients for both the cake and cheesecake.
- Step 2: Mix and bake the red velvet cake according to your recipe, typically involving combining dry ingredients, then wet ingredients, and gently folding them together before pouring into prepared pans and baking until a toothpick comes out clean.
- Step 3: Prepare the cheesecake layer by mixing cream cheese, eggs, vanilla extract, and sour cream, then folding in crushed Oreo cookies. Pour this mixture over the baked and cooled red velvet cake and bake until the cheesecake is set.
- Step 4: Allow the cake to cool completely before topping it with a white frosting made by beating butter and cream cheese together, then gradually adding powdered sugar until smooth and creamy. Decorate the top with additional Oreo cookies.
Handy Tips
- To ensure your cheesecake layer sets properly, avoid overmixing the batter and make sure your oven is at the correct temperature. A water bath can also help prevent cracking.
- For a smooth frosting, make sure your butter and cream cheese are at room temperature, and sift your powdered sugar to avoid lumps.
- Consider using a cake stand or turntable to display your finished cake, as it will make a beautiful centerpiece for any gathering.
Heat Control
Heat control is crucial when baking both the cake and cheesecake layers. The ideal temperature for baking the cake is typically around 350°F (175°C), while the cheesecake might require a slightly lower temperature to prevent cracking. Timing is also key; the cake is usually done when a toothpick inserted comes out clean, and the cheesecake is set when the edges are just slightly jiggly and the center is firm to the touch. Keep an eye on your desserts as oven times can vary based on the size of your pans and your oven’s performance.
Crunch Factor
The crunch factor in this dessert comes from the Oreo cookies both within the cheesecake layer and on top of the cake. To maintain this crunch, it’s best to add the cookies on top just before serving, as they can become soggy if exposed to moisture for too long. If you’re looking for an extra crunchy element, consider adding some chopped nuts or cookie crumbs to the top of the cake as well.
Pro Kitchen Tricks
- For a professional finish, chill your cake in the refrigerator for at least 30 minutes before serving to allow the flavors to meld together and the frosting to set.
- To make your cake more stable, especially if you’re stacking layers or adding heavy toppings, insert a dowel or cake support into the center of the cake.
- Consider using a pastry bag to apply your frosting for a smoother, more even coat, and to create decorative borders or patterns on top.
Storage Tips
- Leftover cake should be stored in the refrigerator to prevent spoilage. It can be kept for up to 5 days when properly stored.
- For longer storage, consider freezing the cake without the frosting, then thawing and frosting when ready to serve.
- When reheating, do so gently to prevent melting the frosting or drying out the cake. A short time at room temperature or a few seconds in the microwave (check the cake every few seconds to avoid overheating) should suffice.
Gift Packaging Ideas
This cake makes a wonderful gift, especially for birthdays or holidays. Consider packaging it in a decorative cake box or on a cake stand wrapped with clear plastic or a large cellophane bag, tied with a ribbon. For a more personal touch, add a handwritten card or a small decorative element that matches the occasion. If you’re gifting just a slice, individual slices can be wrapped in plastic wrap or aluminum foil and placed in a gift bag with a personalized note.
Flavor Variations
- Different spices: Consider adding a pinch of cinnamon, nutmeg, or cardamom to the cake or cheesecake batter for a unique twist on the traditional flavors.
- Creative toppings: Instead of or in addition to Oreo cookies, try using other types of cookies, nuts, or even candy pieces to create a personalized topping.
- Ingredient swaps: For a gluten-free version, substitute the flour with a gluten-free flour blend. You can also experiment with different types of milk or cream cheese alternatives for those with dietary restrictions.
Troubleshooting
- Texture problems: If your cake is too dense, it may be due to overmixing the batter. If your cheesecake is too soft, it might not have baked long enough.
- Ingredient replacements: Always try to use the exact ingredients called for in the recipe, but if you must substitute, do so with ingredients of similar texture and flavor profile.
- Over/undercooking signs: Keep an eye on your cake and cheesecake while they’re baking. A toothpick inserted into the center should come out clean for the cake, and the edges should be set with just a slight jiggle in the center for the cheesecake.
FAQs
- Can I freeze it? Yes, you can freeze the cake without the frosting for up to 2 months. Thaw and frost when ready to serve.
- Is it gluten-free? Not in its traditional form, but you can make it gluten-free by substituting the flour with a gluten-free flour blend.
- Can I double the recipe? Yes, you can double the recipe, but be aware that baking time may increase. Keep a close eye on your cake and cheesecake to ensure they’re cooked through.
Conclusion
Making a red velvet Oreo cheesecake cake with Oreo cookies on top and white frosting is a fun and rewarding baking project that’s sure to impress your family and friends. With its combination of moist red velvet cake, creamy cheesecake, and crunchy Oreo cookies, all topped with a smooth white frosting, it’s a dessert that has something for everyone. Don’t be afraid to get creative with the recipe, trying out different flavor combinations or decorative ideas to make it your own. And remember, the most important ingredient in any dessert is love, so enjoy the process and have fun sharing your creation with others.