What makes brioche bread truly unforgettable? It’s the rich flavor of butter and eggs in every tender slice. This homemade loaf is a perfect weekend project, using simple yeast risen dough and generous amounts of melted butter for an easy yet impressive family favorite. Save this idea
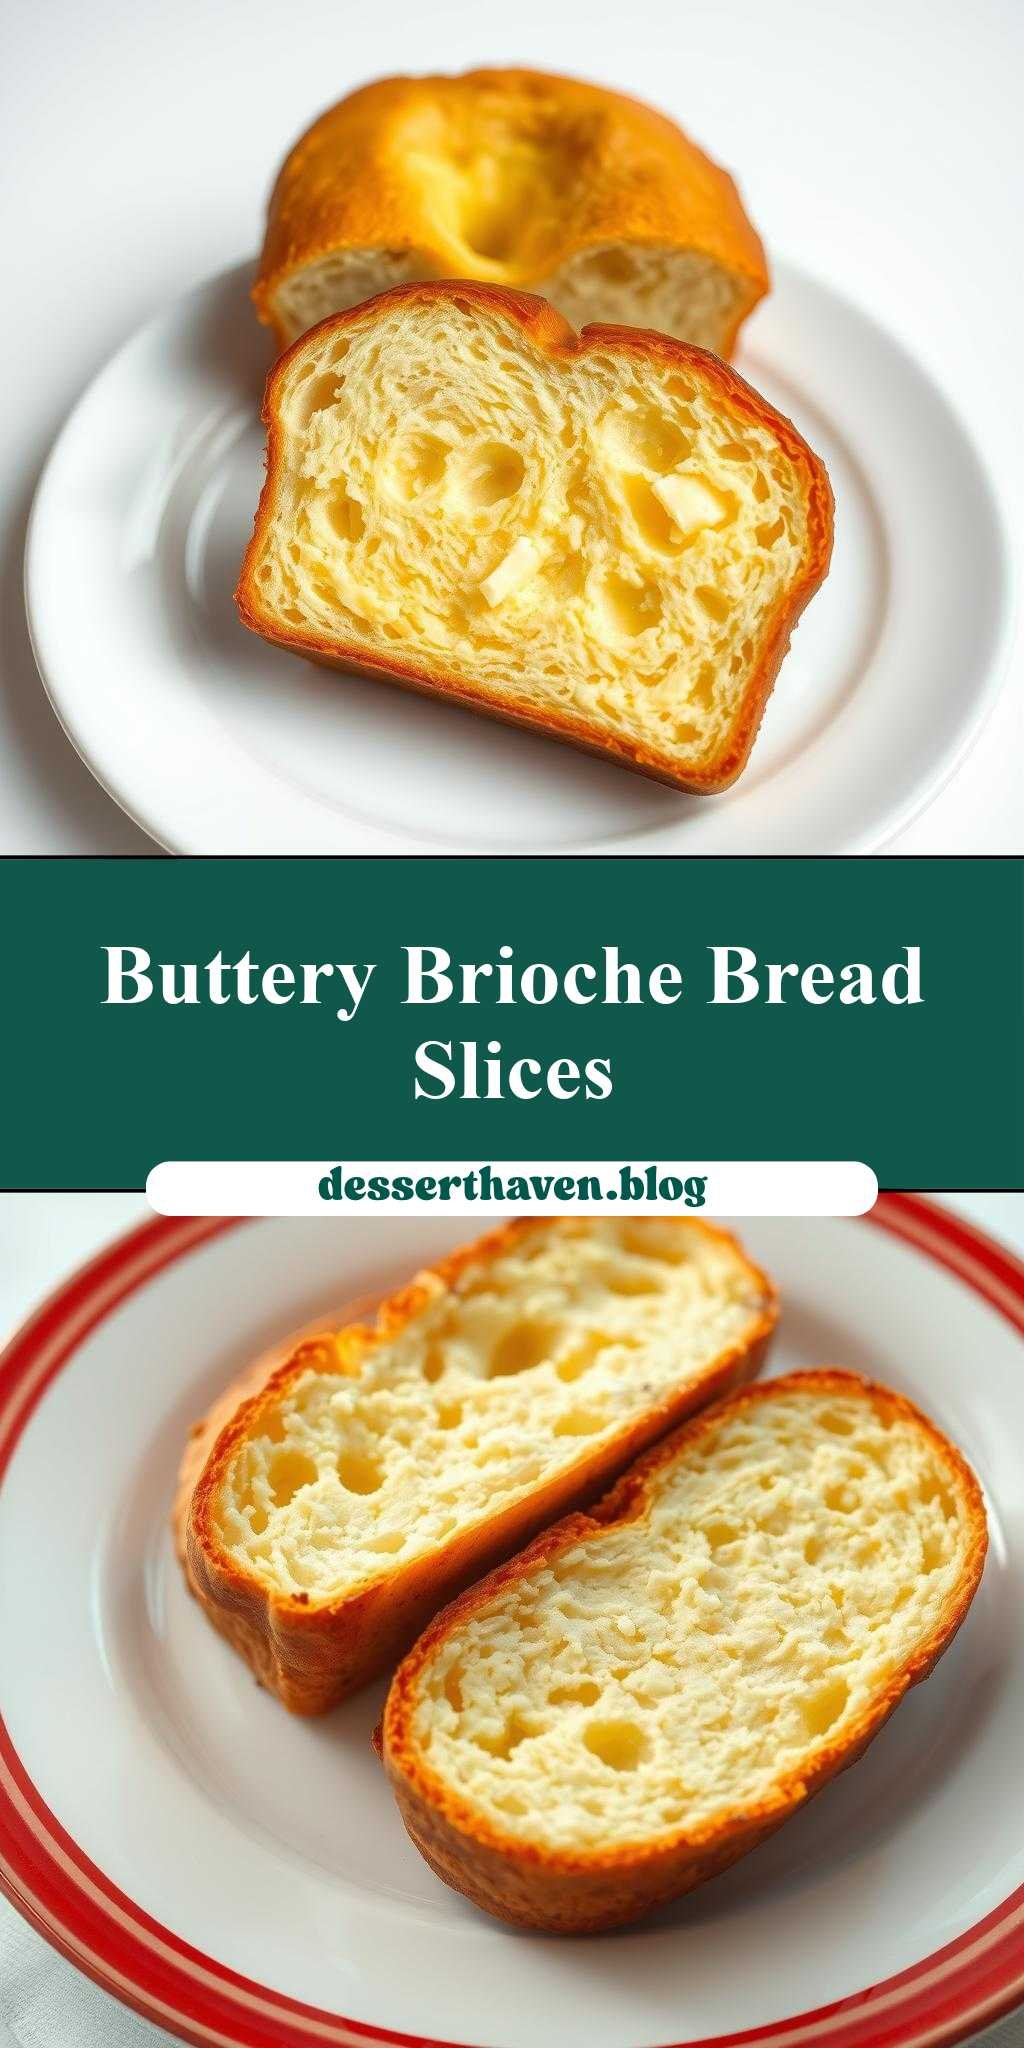
sliced loaf of buttery brioche bread on a white plate with red border
Introduction
Welcome to the world of artisanal baking, where the simplest pleasures can bring the greatest joys. Imagine sinking your teeth into a soft, fluffy slice of buttery brioche bread, fresh from the oven, and served on a crisp white plate with a pop of color from a vibrant red border. This recipe is all about embracing the ease and creativity of baking with everyday ingredients, elevated to new heights by the richness of butter and the elegance of brioche. Whether you’re a seasoned baker or just starting your culinary journey, this sliced loaf of buttery brioche bread is sure to impress and delight, making it perfect for breakfast, brunch, or as a accompaniment to your favorite meals.
Why This Works
- The balance of flavors in brioche, with its mix of yeast, sugar, eggs, and butter, creates a bread that is both rich and light, making it a perfect base for a variety of toppings or spreads.
- The accessibility of ingredients means that you can make this bread with items commonly found in most kitchens, or easily sourced from your local grocery store.
- Despite its impressive appearance and taste, brioche is surprisingly easy to prepare, requiring minimal special equipment and straightforward steps that are hard to mess up.
Key Ingredients
To make a sliced loaf of buttery brioche bread, you will need the following main ingredients: 1 1/2 cups of warm milk, 2 teaspoons of active dry yeast, 3 tablespoons of sugar, 4 large eggs, 4 1/2 cups of all-purpose flour, 1 teaspoon of salt, and 1/2 cup of unsalted butter, softened. For practical substitutions, you can use almond milk or another non-dairy milk for those with dairy intolerance, and gluten-free flour for those requiring a gluten-free diet. However, keep in mind that these substitutions may slightly alter the texture and flavor of your final product.
Instructions
- Step 1: Begin by activating your yeast in the warm milk, mixed with a teaspoon of sugar, and let it sit for about 5-10 minutes until it becomes frothy. This step is crucial as it ensures your yeast is active and will help your dough rise.
- Step 2: In a large mixing bowl, combine the flour, salt, and the remaining sugar. In a separate bowl, whisk together the eggs. Add the softened butter to the dry ingredients and mix until the mixture resembles coarse crumbs. Then, add the yeast mixture and eggs to the dry ingredients and mix until a shaggy dough forms.
- Step 3: Knead the dough for about 10 minutes until it becomes smooth and elastic. You can do this by hand or using a stand mixer with a dough hook attachment. Place the dough in a greased bowl, cover it, and let it rise in a warm place for about 1-2 hours, or until it has doubled in size.
- Step 4: Preheat your oven to 375°F (190°C). Punch down the dough and shape it into a loaf. Place the loaf into a greased 9×5-inch loaf pan, cover it, and let it rise for another 30-45 minutes. Bake the loaf for 35-40 minutes, or until it is golden brown. Remove the loaf from the oven, let it cool in the pan for 10 minutes, then transfer it to a wire rack to cool completely. Once cooled, slice the loaf and serve on a white plate with a red border, adding any desired toppings or spreads.
Handy Tips
- Ensure your ingredients, especially the eggs and butter, are at room temperature before starting to mix your dough, as this will help the dough come together more smoothly and evenly.
- Avoid overmixing the dough, as this can lead to a dense bread. Mix your ingredients just until they come together in a shaggy mass, then let the kneading process develop the dough’s texture.
- Keep an eye on your bread while it’s baking, as the baking time may vary depending on your oven and the size of your loaf.
Heat Control
For baking the brioche, it’s crucial to maintain an oven temperature of 375°F (190°C). This temperature ensures that the bread cooks evenly and rises properly without burning. The baking time will be around 35-40 minutes for a standard 9×5-inch loaf. Signs of doneness include a golden brown color on the top and sides of the loaf, and it should sound hollow when tapped on the bottom.
Crunch Factor
The crust of a well-baked brioche should be golden and slightly crunchy, giving way to a soft and airy interior. To achieve this, make sure your oven is preheated correctly and that you don’t overbake the loaf. A light egg wash applied to the top of the loaf before baking can also enhance the crust’s color and texture.
Pro Kitchen Tricks
- Use high-quality ingredients, especially the butter, as it will significantly impact the flavor and texture of your brioche.
- Don’t skip the step of letting the dough rise. The yeast needs time to ferment the sugars in the dough, which will give your brioche its characteristic light and airy texture.
- For an extra rich flavor, you can add a teaspoon of vanilla extract or a handful of chopped nuts to the dough before the final rise.
Storage Tips
- Brioche bread is best consumed fresh, but it can be stored at room temperature for up to 2 days. Wrap the loaf tightly in plastic wrap or aluminum foil to keep it fresh.
- For longer storage, you can freeze the loaf. Wrap it tightly in plastic wrap or aluminum foil and place it in a freezer-safe bag. Frozen brioche can be stored for up to 2 months.
- To reheat frozen brioche, thaw it overnight at room temperature, then wrap it in foil and bake in a preheated oven at 350°F (175°C) for about 10-15 minutes, or until warmed through.
Gift Packaging Ideas
If you’re considering gifting your freshly baked brioche, a beautifully presented loaf can make a wonderful gift. Wrap the cooled loaf in a decorative paper or a linen cloth, and tie it with a ribbon. You can also include a jar of homemade jam or honey, and a packet of specialty coffee or tea, to create a complete gourmet gift basket.
Flavor Variations
- Try adding different spices like cinnamon, nutmeg, or cardamom to the dough for unique flavor profiles.
- Experiment with creative toppings such as caramelized bananas, chocolate shavings, or toasted almonds to add texture and flavor to your brioche.
- Swap out some of the all-purpose flour with whole wheat flour for a nuttier, healthier version of brioche.
Troubleshooting
- If your dough is too sticky, add a little more flour. If it’s too dry, add a little more milk or egg.
- If your brioche doesn’t rise properly, check that your yeast is active and that your rising environment is warm and draft-free.
- If your loaf is overcooked, it will be dry and possibly burnt. Keep an eye on the baking time and temperature to avoid this.
FAQs
- Can I freeze it? Yes, you can freeze brioche bread for up to 2 months. Wrap it tightly and store in a freezer-safe bag.
- Is it gluten-free? No, traditional brioche contains gluten due to the all-purpose flour. However, you can experiment with gluten-free flours for a gluten-free version.
- Can I double the recipe? Yes, you can double the recipe to make two loaves. Just ensure you have enough space for the dough to rise and that your oven can accommodate both loaves at once.
Conclusion
Making a sliced loaf of buttery brioche bread on a white plate with a red border is a rewarding baking project that combines simplicity with elegance. With its rich, buttery flavor and soft texture, brioche is a versatile bread that can be enjoyed at any time of day. Whether you’re a beginner or an experienced baker, this recipe offers a great opportunity to practice your skills and experiment with new flavors and presentations. So, go ahead, get baking, and share your creations with friends and family to spread the joy of homemade bread!